|
- Getting ready tips.
- Paint brush tips.
- Paint rollers and paint tray tips.
- Painting tips.
- Clean-up tips and storing paint.
- One more thing and you're finished.
- Links to other helpful articles.
GETTING READY TIPS
- Prepare the room for painting. If it is not possible to empty the room, move furniture to the center. Use plastic sheathing or tarps for covering furniture, not old sheets or fabric, paint will seep through fabric. Remove every thing from the walls. Remove nails, screws and picture hangers if they will not be used again. To remove plastic screw plugs or anchors, insert a screw partially into the plug and use a claw hammer or pair of pliers to remove the screw and plug.
- Remove all of the hardware such as switch plates, receptacle (outlet) plates, doorknobs, drapery hardware, etc. Place the parts in a plastic bag and store it out of the way. Read also "Getting the room ready for painting"
- Be organized. Set up a "paint station." Have all the tools and paint you will need in or near the working area.
PAINTBRUSH TIPS
Tug on the bristles before purchasing a brush. There may be a defect if one or more bristles can be pulled out.
PAINT ROLLERS and PAINT TRAY TIPS
- Keep the roller cover from flying off the handle by positioning the roller so that the open end points in the direction you are painting.
- Buy an inexpensive tray liner for fast and easy cleanups. You can also line the paint tray with aluminum foil. This method is not as effective and you have to watch not to rip the foil.
PAINTING TIPS
-Before leaving the work area, check the bottom of your shoes to see if you stepped on some spilled paint. You do not want to track wet paint to other parts of the house.
- Place an aluminum pie pan under the paint can as a catcher. When it is time to clean up you can throw out the pan or clean and save it for your next painting job.
- If you are painting using a ladder, fashion some hooks from a wire clothes hanger, see photo. These handy hooks hold both the paint can and paint brush.
- The best way to load a paint brush is to dip the brush about an inch into the paint and then gently tap the brush against both sides of the paint can. Don’t wipe the brush against the side of the can; you will rub off too much paint.
- To keep the rim paint free you can
a: purchase a can spout which attaches to the rim (under $2)
b: replace the lid with one that has a pull-up spout (around $5).
c: cover the rim of the can with masking tape. Now, when you pour paint from the can the groove at the top of the paint can will stay paint free. Remove the tape for a clean groove, this makes for a better seal when replacing the lid.
- You can get rid of paint odors faster by placing some shallow dishes filled with undiluted white vinegar around the room.
- Have the primer tinted to match your intended top coat and you most likely need only one coat of paint.
- Always keep a wet edge. Never stop in the middle of a wall.
- If it is time for a break place the roller and/or brush in a plastic bag to keep everything wet.
- Always remove painter's tape before the paint dries.
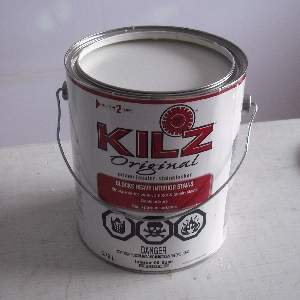
- Kilz Original is my preferred choice of primer. It seals any wall paper glue and nicotine residue that was missed when cleaning the walls.
- Mold or mildew can be removed with a 50-50% mix of bleach and water. You may not be allergic to the fumes but why not play it safe and use a face mask. Keep the affected area dry to prevent further growth. If the mildew or mold affected area is significant in size you will have to find the source of the problem and make any necessary repairs instead of just painting over it. Some paints are mildew and mold resistant and may act as a vapor barrier to keep the problem under control. Read more about how to prevent mold and mildew.
CLEAN-UP TIPS - STORING PAINT
- Pour used paint thinner into a large glass pickle jar and let it sit for a week or two. Paint particles will settle on the bottom. Once the thinner is clear pour it slowly back into the original paint thinner container and it can be used again!
- Leftover paint can stay good for a long time. Make sure the lid is on tight and store the can upside down to prevent air from drying out the paint.
- Any leftover paint, regardless of colour or texture can be thoroughly mixed and used to paint the garage.
- WARNING. Never store paint near the furnace or other open flame appliances. Store cans in a cool and dry area.
ONE MORE THING AND YOU'RE FINISHED
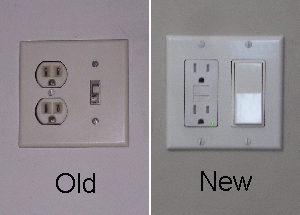
The painting is finished and the tools have been cleaned. You stand back and admire your "new" room and then you realize that there is one more item to look after before moving the furniture back. Maybe now is the right time to replace those outdated light switches and receptacles. They are inexpensive and easy to replace. If you are not sure about doing the job yourself, call an electrician.
LINKS TO OTHER HELPFUL ARTICLES
Oil or latex? How to test old paint. Advantages, disadvantages.
Tools and supplies. For surface preparation and painting.
Paint Tray Liners. Make your own. Do you really need one?
Buy the right brush or roller. Bristles, roller material, nap length.
Surface preparation. Wallpaper glue. Treating mildew.
Liquid sandpaper - deglossers. What it is. What it doesn't do.
Clean-up time. Brushes, rollers, trays, solvents, paint disposal.
Lead in paint. Health warning. Remedial action. Government.
Lead. Sources of lead other than paint. Remedial actions. Health concerns. |
|

I used Kilz as a primer to make sure to seal any wall paper glue residue left on the wall after cleaning.
Kilz is a primer, sealer and stainblocker. It also blocks heavy water and smoke stains.

The painting is finished and the tools have been cleaned. You stand back and admire your "new" room and then you realize that there is one more item to look after before moving the furniture back. Maybe now is the right time to replace those outdated light switches and receptacles. They are inexpensive and easy to replace. If you are not sure about doing the job yourself, call an electrician.
Shown in the picture is a GFCI receptacle for the bathroom. |
|